Active Directory Federation Services
AD FS provides simplified, secured identity federation and Web single sign-on (SSO) capabilities for end users who want to access applications within an AD FS-secured enterprise, in federation partner organizations, or in the cloud.
In Windows Server® 2012 R2, AD FS includes a federation service role service that acts as an identity provider (authenticates users to provide security tokens to applications that trust AD FS) or as a federation provider (consumes tokens from other identity providers and then provides security tokens to applications that trust AD FS).
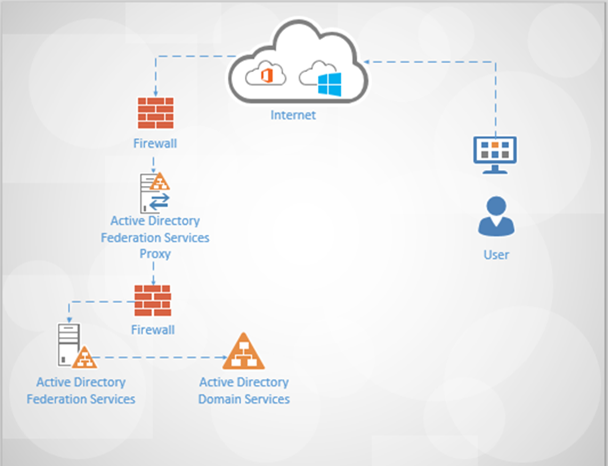
The function of providing extranet access to applications and services that are secured by AD FS is now performed by a new Remote Access role service called Web Application Proxy. This is a departure from the prior versions of Windows Server in which this function was handled by an AD FS federation server proxy. Web Application Proxy is a server role designed to provide access for the AD FS-related extranet scenario and other extranet scenarios.
(https://technet.microsoft.com/en-us/library/hh831502.aspx)
Practical applications
AD FS simplifies access to systems and applications by using a claims-based authentication and access authorization mechanism to maintain application security. Prior versions of AD FS were used for the following:
· Providing your employees or customers with a web-based, SSO experience when accessing claims-based applications within your enterprise.
· Providing your employees or customers with a web-based, SSO experience to access resources in any federation partner organization.
· Providing your employees or customers with a Web-based, SSO experience when remote accessing internally hosted Web sites or services.
· Providing your employees or customers with a web-based, SSO experience when accessing resources or services in the cloud.
AD FS in Windows Server® 2012 R2 adds additional practical applications for AD FS, including the following:
· Device workplace join for SSO and seamless second factor authentication. This enables organizations to allow access from devices that are personally owned by users and manage the risk when providing this access.
· Managing risk with multi-factor access control. AD FS provides a rich level of authorization that controls who has access to what applications. This can be based on user attributes (UPN, email, security group membership, authentication strength, etc.), device attributes (whether the device is workplace joined) or request attributes (network location, IP address, or user agent).
· Managing risk with additional multi-factor authentication for sensitive applications. AD FS allows you to control policies to potentially require multi-factor authentication on a per application basis. In addition, AD FS provides extensibility points for any multi-factor vendor to integrate deeply for a secure and seamless multi-factor experience for end users.
· Providing authentication and authorization capabilities for accessing web application resources from the extranet that are protected by the Web Application Proxy.
(https://technet.microsoft.com/en-us/library/hh831502.aspx)
Checklist ADFS Single Sign-On
More Details: (https://technet.microsoft.com/library/jj205462.aspx)
Prepare for ADFS
In order to implement this SSO solution, you must meet the following requirements:
-
Have Active Directory deployed and running in either Windows Server 2003 R2, Windows Server 2008, Windows Server 2008 R2, Windows Server 2012, or Windows Server 2012 R2 with a functional level of mixed or native mode.
-
If you plan to use AD FS as your STS, you will need to do one of the following:
-
Download, install and deploy AD FS 2.0 on a Windows Server 2008 or Windows Server 2008 R2 server. Also, if users will be connecting from outside your company’s network, you must deploy an AD FS 2.0 proxy.
-
Install the AD FS role service on a Windows Server 2012 or Windows Server 2012 R2 server.
-
-
If you plan to use Shibboleth Identity Provider as your STS, you will need to install and prepare an operational Shibboleth Identity Provider.
-
Based on the type of STS you will set up, use the Microsoft Azure Active Directory Module for Windows PowerShell to establish a federated trust between your on-premises STS and Azure AD.
-
Install the required updates for your Microsoft cloud service subscriptions to ensure that your users are running the latest updates of either Windows 7, Windows Vista, or Windows XP. Some features may not work properly without the appropriate versions of operating systems, browsers, and software.
Prepare Active Directory
Active Directory must have certain settings configured in order to work properly with single sign-on. In particular, the user principal name (UPN), also known as a user logon name, must be set up in a specific way for each user.
Note:
To prepare your Active Directory environment for single sign-on, we recommend that you run the Microsoft Deployment Readiness Tool. This tool inspects your Active Directory environment and provides a report that includes information about whether or not you are ready to set up single sign-on. If not, it lists the changes you need to make to prepare for single sign-on. For example, it inspects whether or not your users have UPNs and if those UPNs are in the correct format.
The UPN for the Azure Active Directory users will be different to the on-premises domain. In this step, we configure the on-premises domain to use an alternate UPN to allow users to sign in to the cloud services domain name. This will be the domain name that was registered externally e.g. “Fazar.info”. This section will outline how to configure the alternative UPN on DC1.
Setup UPN:
1. Logon to DC1.
2. On the Start Screen click Administrative Tools, then start Active Directory Domains and Trusts.
3. Right-click Active Directory Domains and Trusts then left-click Properties.
4. Select the UPN Suffixes tab.
5. In the Alternative UPN Suffixes box, type the alternative UPN suffix (your public domain) for the forest, and then click Add.
6. Click OK.
7. Close Active Directory Domains and Trusts.
Requirement ADFS
The minimum number of users to servers recommendations provided in the previous table are calculated based on the following hardware:
· 1 IP Public
· 1 SSL Wild Card Public (sts. Domain public)
AD FS software must be installed on any computer that you are preparing for the federation server or federation server proxy role. You can install this software by either using the AD FS Setup Wizard or by performing a quiet installation using the adfssetup.exe /quiet parameter at a command line.
For a base installation platform, AD FS requires either the Windows Server 2008, Windows Server 2008 R2, Windows Server 2012, or Windows Server 2012 R2 operating system. AD FS has a separate installation package for the Windows Server 2008, Windows Server 2008 R2 operating system platforms (and it is commonly referred to as AD FS 2.0) or it can be installed by adding the Federation Service server role as part of the Windows Server 2012 or Windows Server 2012 R2 operating system.
If you are using AD FS 2.0 or AD FS in Windows Server 2012, you will deploy and configure federation server proxies as part of implementing your SSO solution.
If you are using AD FS in Windows Server 2012 R2, you will deploy Web Application Proxies in order to configure your AD FS deployment for extranet access. In Windows Server 2012 R2, a Web Application Proxy, a new role service of the Remote Access server role, is used to enable your AD FS for accessibility from outside of the corporate network.
Prepare DNS
If you are using a different domain name for the internal Active Directory as to the domain of the ADFS service name sts.<externally registered domain> we will need to setup a Split-brain DNS internally for <externally registered domain>. For more information see http://support.microsoft.com/kb/2715326 . This section will outline how to configure a Split Brain DNS configuration for the environment on the DNS server installed on DC1.
1. On your Domain controller open DNS then in the console tree, expand DC1(your hostname DC), expand Forward Lookup Zones, right-click <publicly registered domain name>, and then click New Host (A or AAAA).
2. In Name, type sts.
3. In IP address, type the IP address (local adfs server).
4. Click Add Host.
5. Click OK.
At the Domain provider
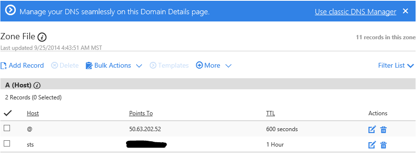
1. Logon your publicly registered domain Provider (e.g. GoDaddy).
2. Add an A record for “STS” and use the Public virtual IP address as assigned for sts.<domain public>.
· As an example, if you use a service like GoDaddy the configuration will look like the figure below:
Import the Public SSL Wild Card Certificate to ADFS & ADFS Proxy Server
1. Logon to your ADFS Server.
2. Create Folder cert at desktop ADFS Server.
3. Copy your Cert Public to the folder on desktop ADFS Server.
4. Click Run on your Cert Public.
5. In the License Agreement click I Accept.
6. Make sure SSL is selected.
7. Select Import.
8. Click Browse and select the certificate that you just saved to the Desktop.
9. Click Open.
10. Click Next.
11. Enter a Friendly name for the Cert that you will easily recognize like ADFS SSL Wild Card Certificate.
12. Click Finish.
13. In the User Account Control window click OK.
Install AD FS Server
1. Logon to AD FS Server.
2. Open Server Manager.
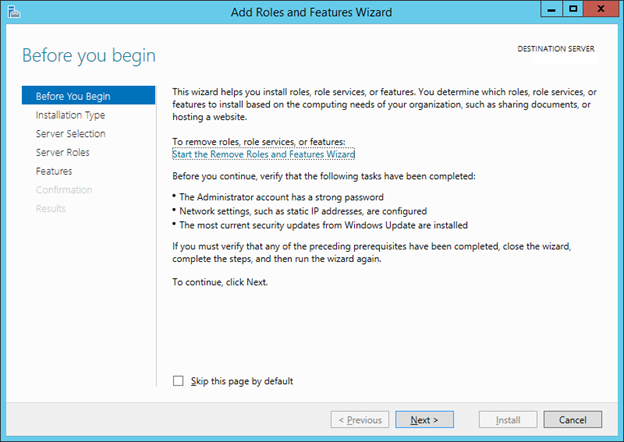
3. In the Quick Start tab of the Welcome tile on the Dashboard page, click Add roles and features.
4. On the Before you begin page, click Next.
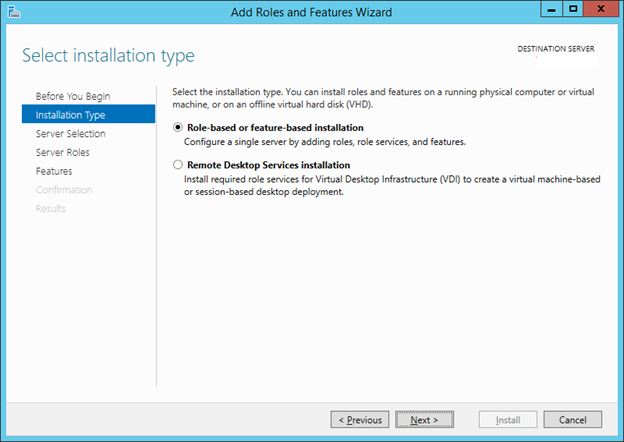
5. On the Select installation type page, click Role-based or Feature-based installation, and then click Next.
6. On the Select destination server page, click Select a server from the server pool, verify that the target computer is selected, and then click Next.
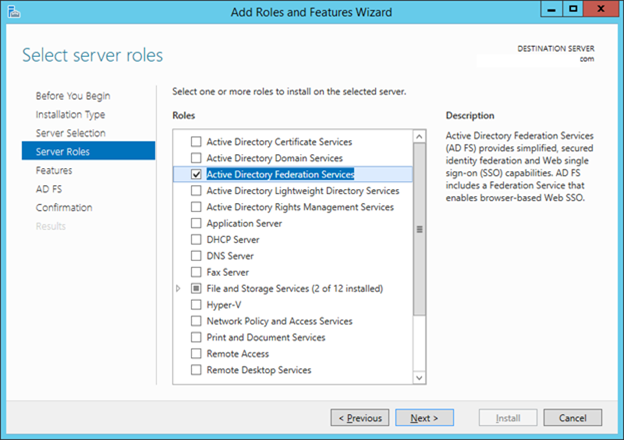
7. On the Select server roles page, click Active Directory Federation Services, and then click Next.
8. On the Select features page, click Next. The required prerequisites are preselected for you. You do not have to click any other features.
9. On the Active Directory Federation Service (AD FS) page, click Next.
10. After you verify the information on the Confirm installation selections page, click Install.
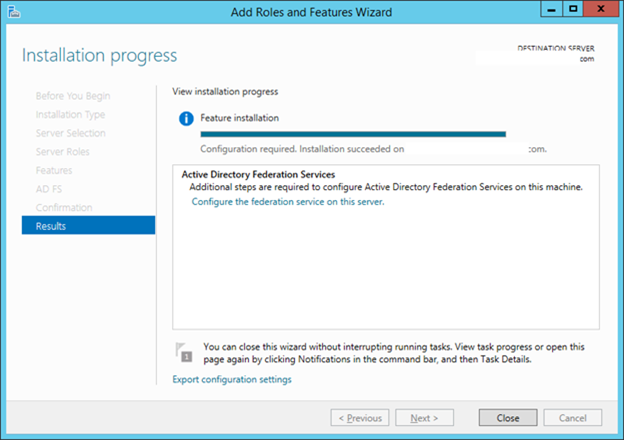
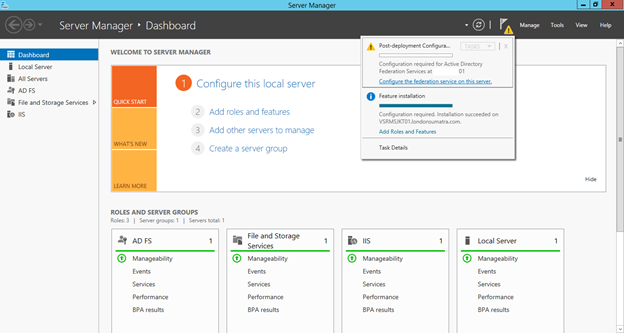
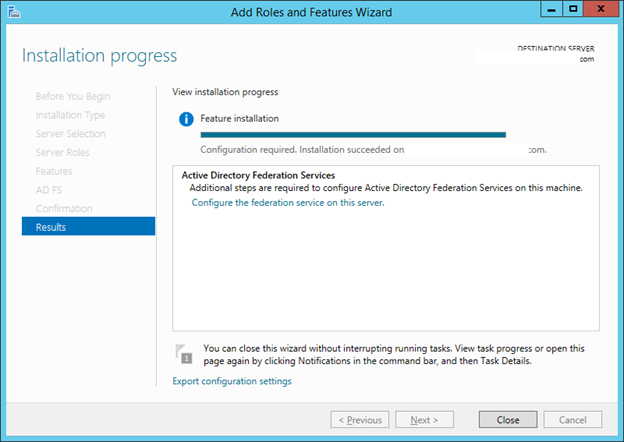
11. On the Installation progress page, verify that everything installed correctly, don’t close the window. We come back here quickly.
12. Enable Group Managed Service Accounts
Open a PowerShell window as Administrator and type:
13. Add-KdsRootKey –EffectiveTime (Get-Date).AddHours(-10)
14. Switch back to the Add Roles and Features Wizard.
Configure ADFS
15. Click Configure the federation service on this server.
16. In the Welcome windows make sure Create the first federation server in a federation server farm is selected and click Next.
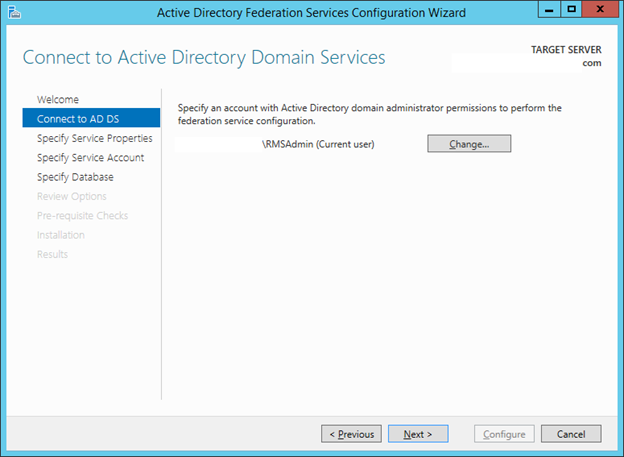
17. In the Connect to AS DS leave the domain admin credentials and click Next.
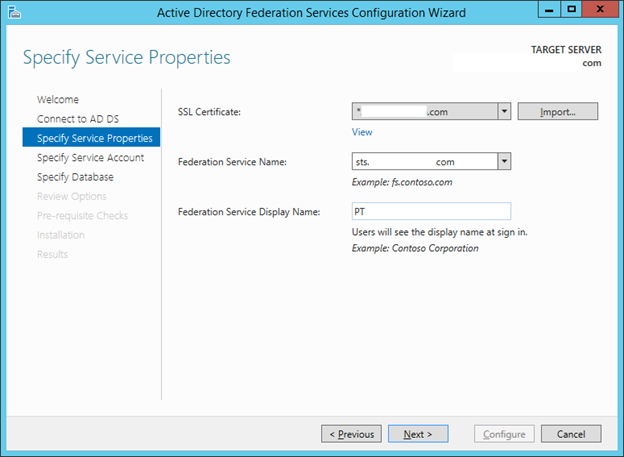
18. For the SSL Certificate select the wildcard cert created earlier from the dropdown menu “*.<publicly registered domain>”.
19. For the Federation Service Name change the Wildcard with the name for the federation service “sts.<publicly registered domain>”. (E.g sts.fazar.info)
20. In the Federation Service Display Name: enter Federation Service.
21. Click Next.
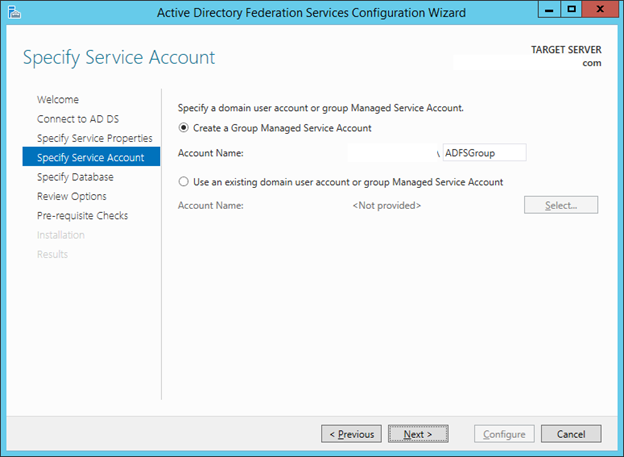
22. In the Specify Service Account window under Create a group Managed Service Account enter “ADFSGroup” (without quotations).
23. Click Next.
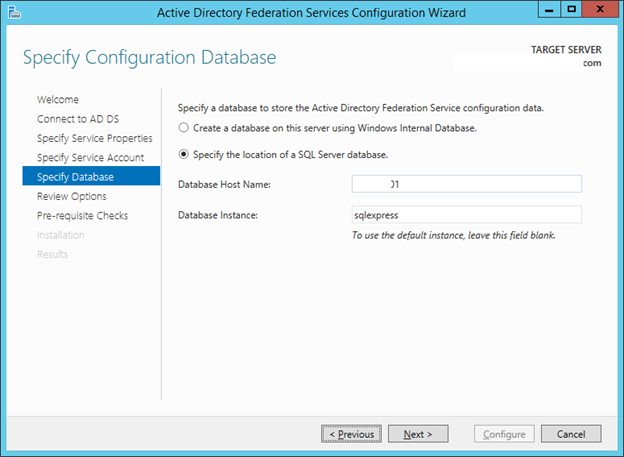
24. In the Specify Configuration Database window make sure the Create database on this server using the Windows Internal Database is selected (in here I try with SQL Express but recommendation technet is using WID).
25. Click Next.
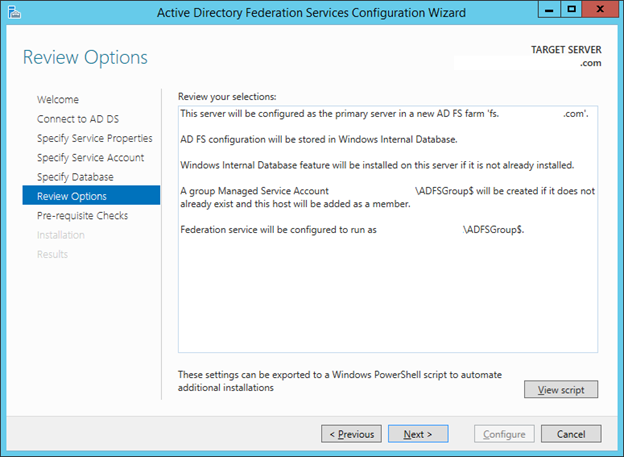
26. In the Review options window make sure all values are correct.
27. Click Next.
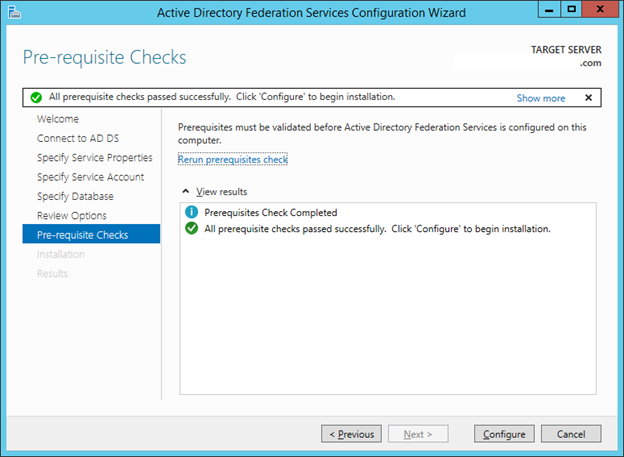
28. In the pre-requisite Checks window validate all prerequisites are met and click Configure.
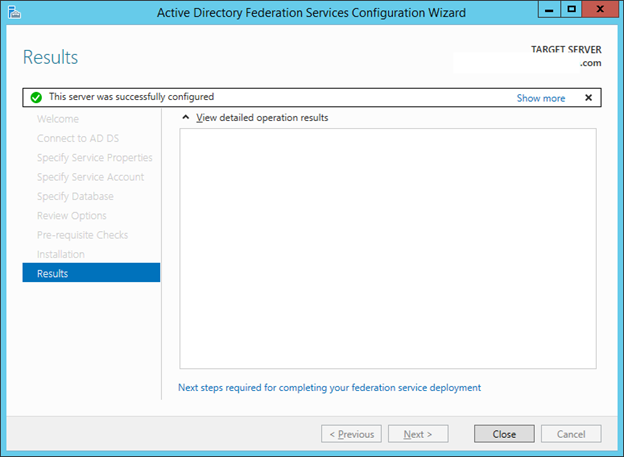
29. Click Close.
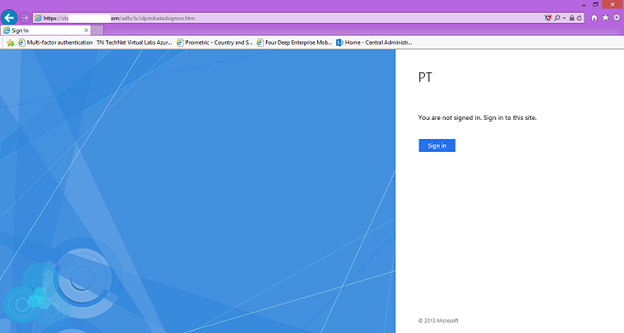
30. To test if the ADFS server and DNS configuration is configured correctly open Internet Explorer from DC and enter https://sts.<registered domain name>/adfs/ls/idpinitiatedsignon.htm. A sign in page should appear.
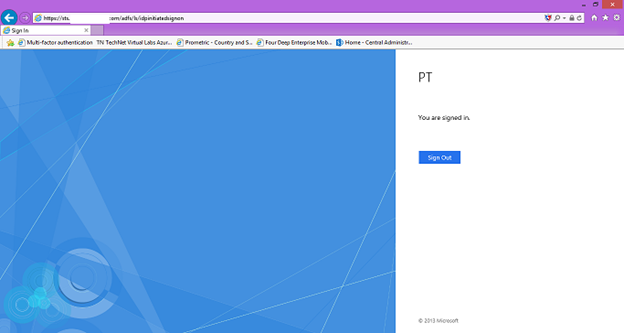
31. To test the sign in you can sign in with the On-Premises account.
Install ADFS Proxy
1. Logon to AD FS Proxy Server.
2. Open Server Manager.
3. In the Quick Start tab of the Welcome tile on the Dashboard page, click Add roles and features.
4. On the before you begin page, click Next.
5. On the Select installation type page, click Role-based or Feature-based installation, and then click Next.
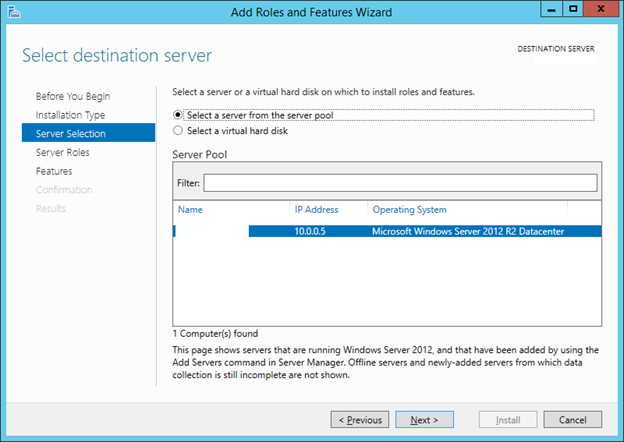
6. On the Select destination server page, click Select a server from the server pool, verify that the target computer is selected, and then click Next.
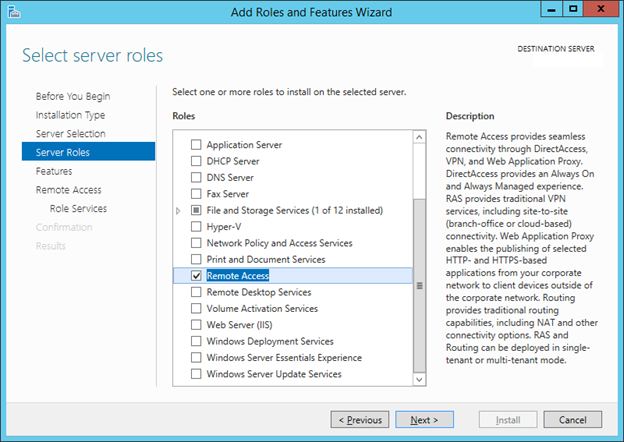
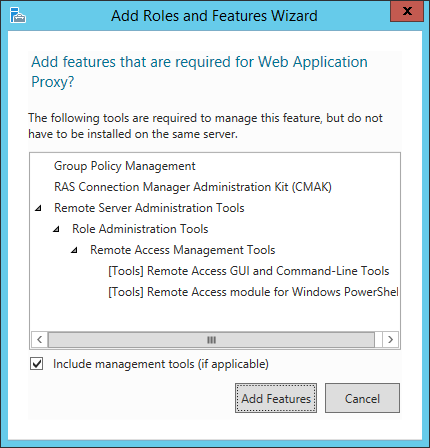
7. On the Select server roles page, click Remote Access, click Add Features and then click Next.
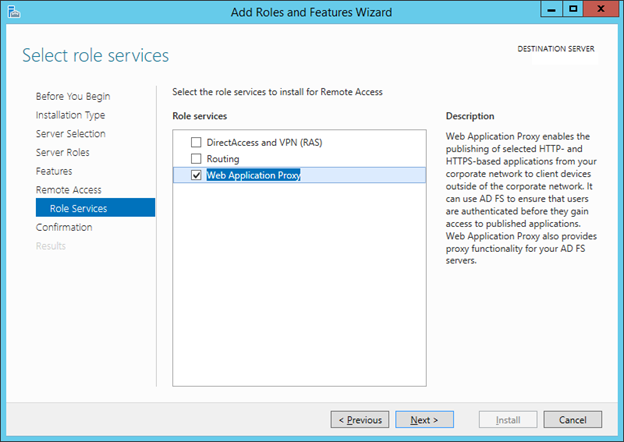
8. On the Role Services, check Web Application Proxy. Click Next.
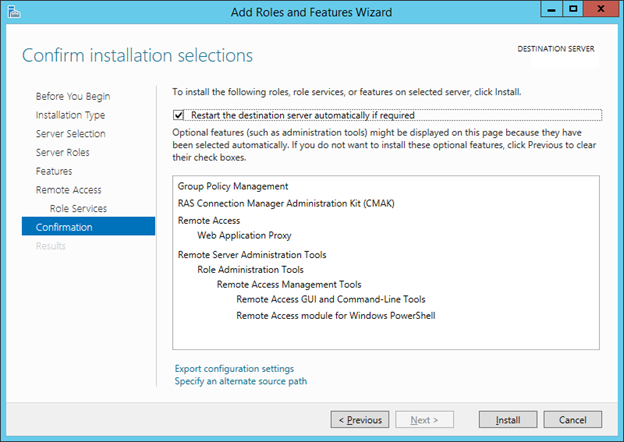
9. On the Confirmation, click Install.
10. After you verify the information on the Confirm installation selections page, click Install.
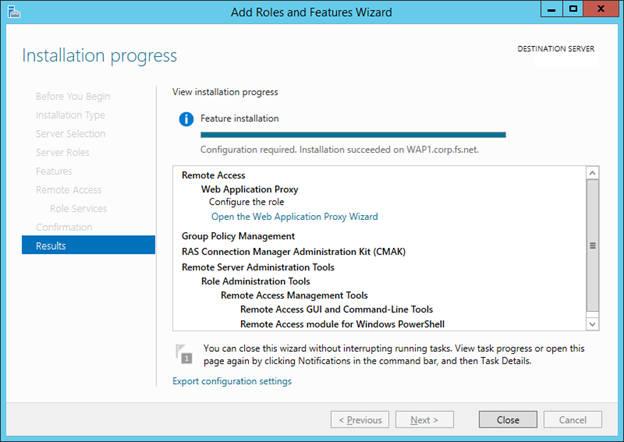
11. On the Results page, verify that install success. Click Close.
Configure ADFS
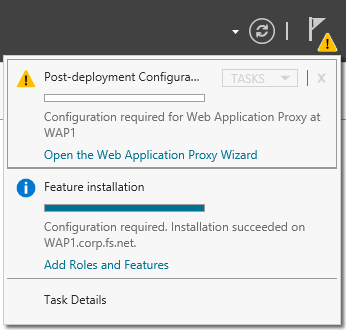
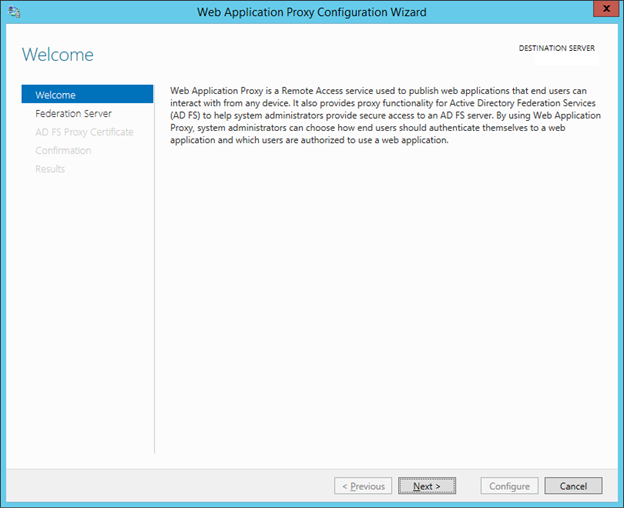
12. Click Open the Web Application Proxy Wizard.
13. In the Welcome pages,click Next.
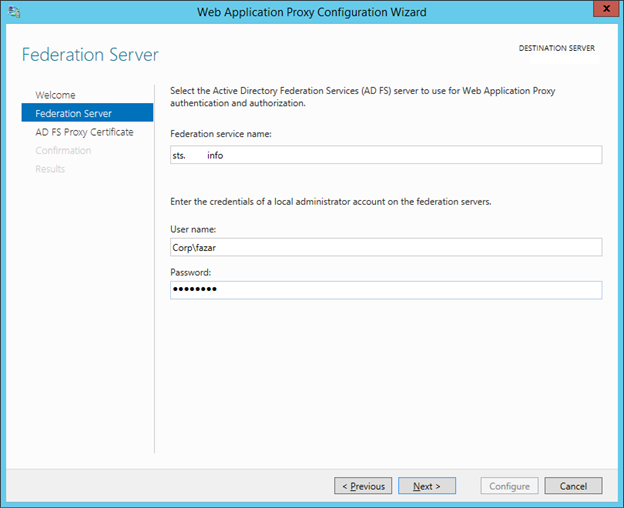
14. In the Federation Server Pages :
-
Fill the Federation service name column with your ADFS server hostname.
-
Fill the User name & Password Column
Click Next.
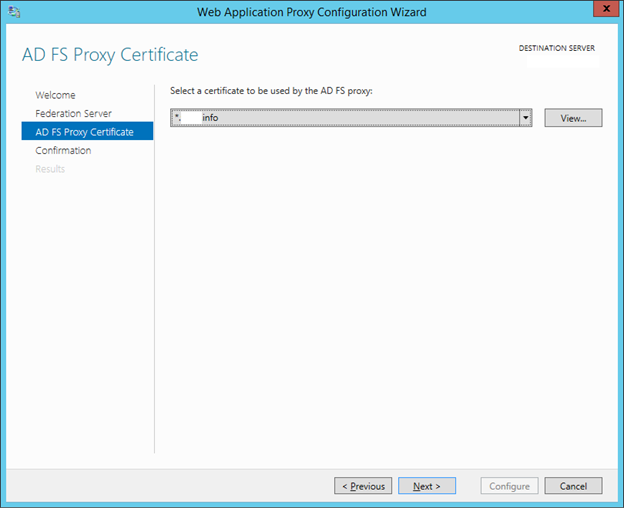
15. In the AD FS Proxy Certificate choose your wild card certificate that’s have imported already.
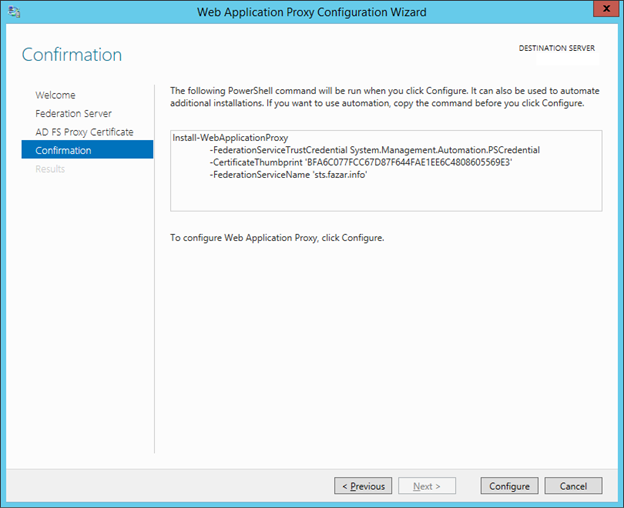
16. In the Confirmation Pages, click Configure.
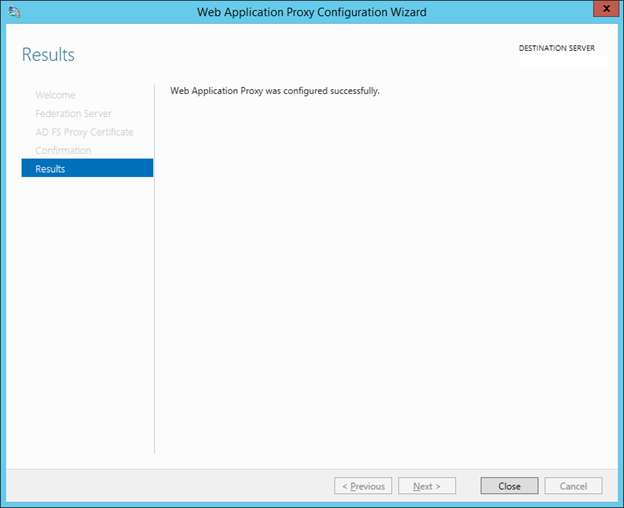
17. In the Result Pages, click Close.
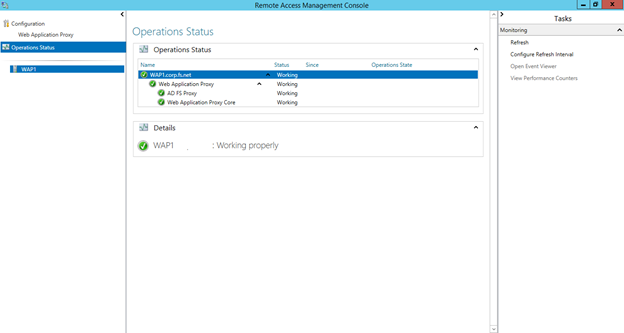
18. Open Remote Access Management Console and make sure all services running well.
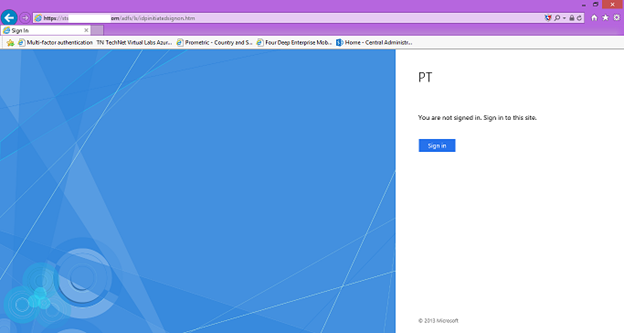
19. Open Internet Explorer from External access (Internet) and enter https://sts.<registered domain name>/adfs/ls/idpinitiatedsignon.htm. A sign in page should appear.
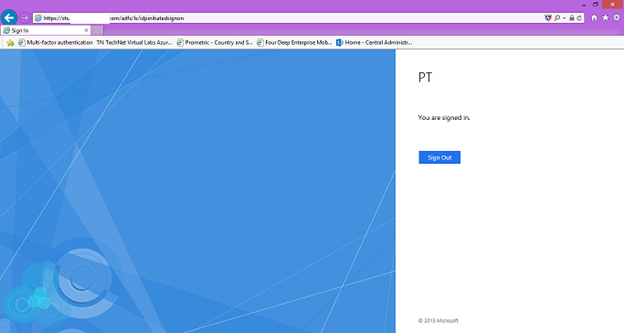
20. To test the sign in you can sign in with the On-Premises account.


5 thoughts on “Use AD FS as Single Sign-On Windows Server 2012 R2”